Related links
Related links are a great way to signpost viewers to relevant content and gives them an easy way to keep browsing. In contrast, a 'dead end' page often increases their likelihood to leave the site once they've found what they need.
Example
Below is an example of the related link content type. It can either contain three or four links and is shown at the bottom of a page no matter where you put it in the content section.

Steps
Step one - Create a related link container
The related links need to sit within a container otherwise they won't show on the page. Creating the container first will ensure that you don't forget this step.
- Create the 'related link container' content type by pressing the green '+ Add content' button.
- Select 'related link container' in the content type list. If it is not there, type its name in the content type search bar and it should appear.

Step two - Fill in the fields
- Fill in the relevant fields
- Select whether you want a row of three or four related links
Note: don't confuse this with the process of creating cards. Card content needs to be put in a child section but related links can be created in the same section as the related link container.

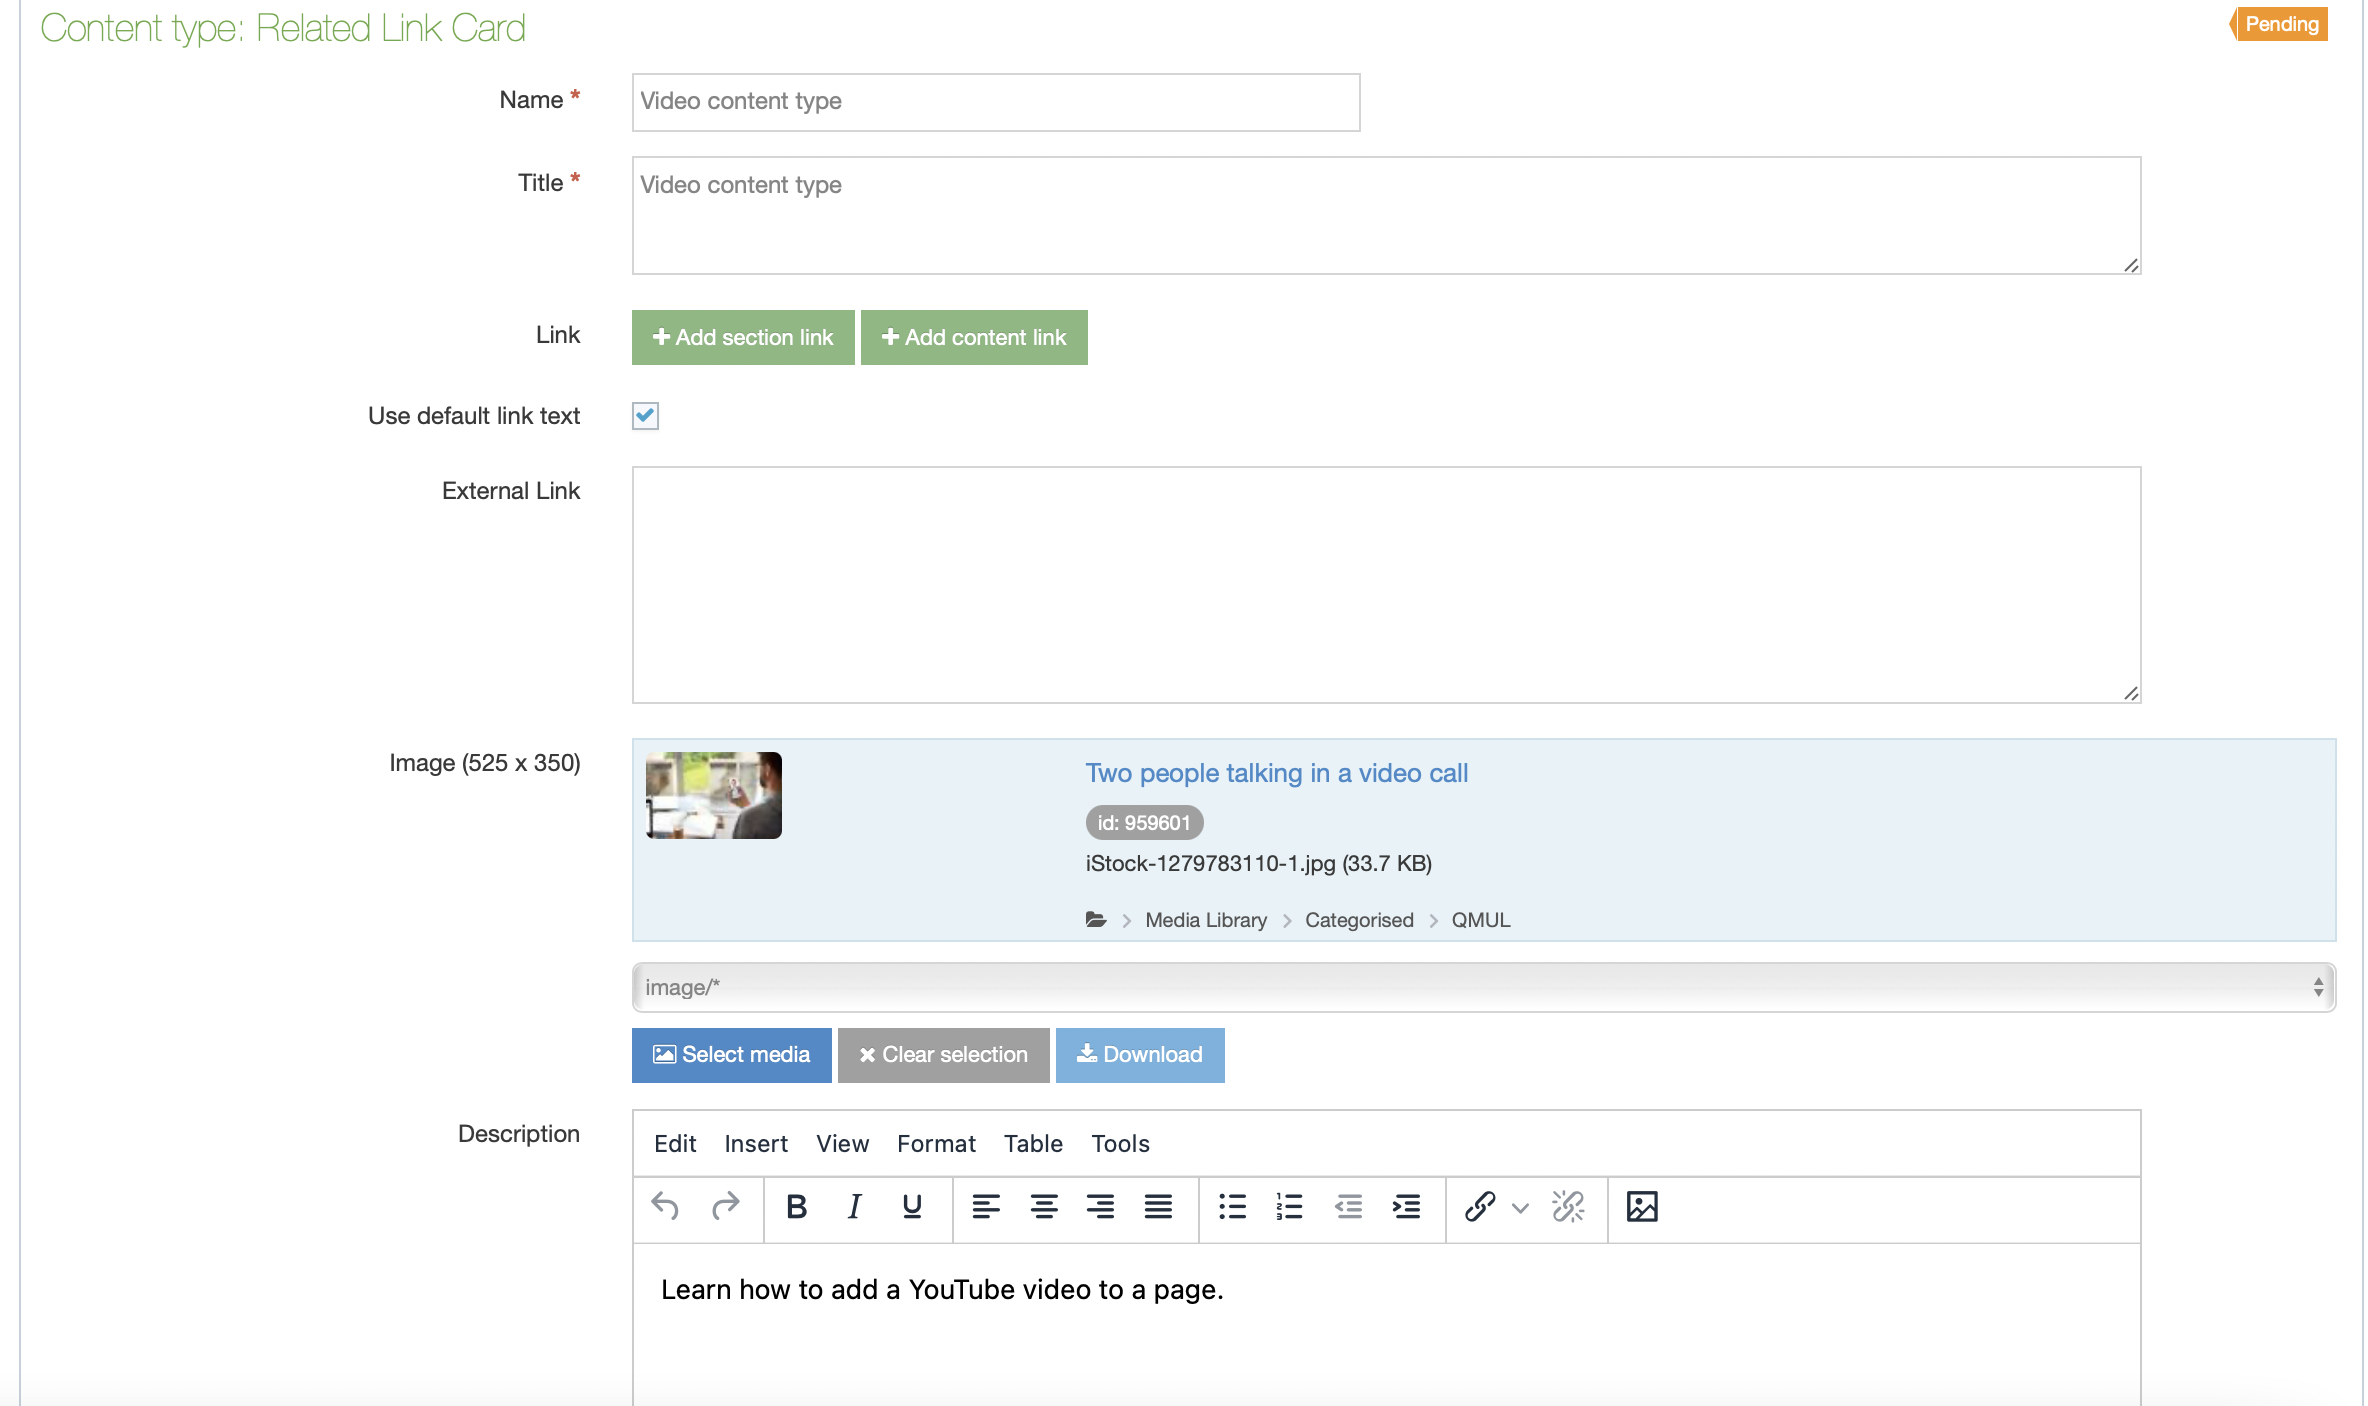
Step three - create related link cards
- Created a related link card by clicking the same '+Add content' button and look for 'Related link card'.
- Fill in the relevant fields.
- Select an image from the media library by clicking 'Select media' which will take you to the Media Library.
- Images must be 525x350.
- Add a description in the 'Description' field. Remember to add a description to the other related links to keep a coherent design. Aim for five to twelve words so that the description is maximum two lines long.
- Link the related link card to the page it should lead to.
- Repeat three or four times, depending on how many related link cards you wanted.
Step four - Publish your content
- Click the small down arrow next to 'Save changes' so it opens a small window.
- Click 'Save and approve'.
- Repeat for all your related links and related container.
- Publish the (child) section they sit within to make sure it is published.

Uploading images - important note
Make sure you have the appropriate permissions before publishing an image or video. This includes permission of the copyright holder and, in some cases, the permission of anybody in the image (eg a signed consent form). Find out more about this on our Images page.